Fun and technology on maps
Moderator: Jaro
Fun and technology on maps
I don't know if you will read this ..
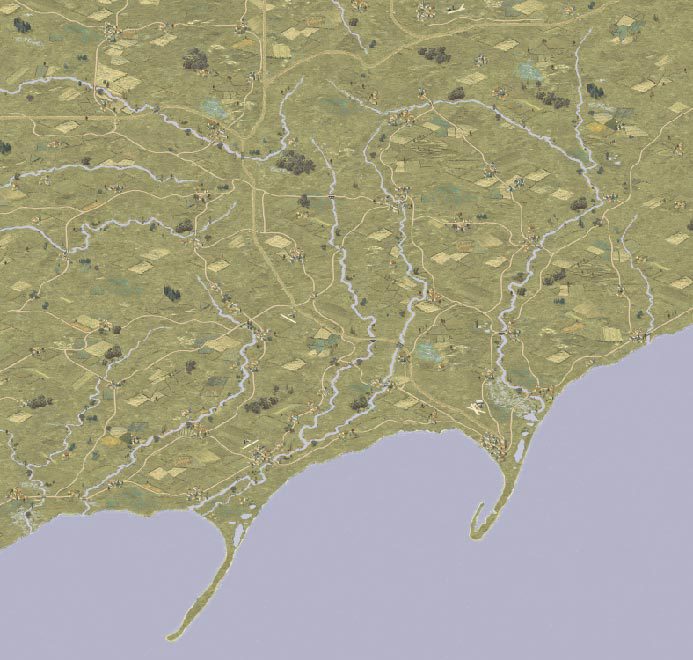
I decided to make a classic map (drawing) .. just to try
I lack experience and components here
So I used the sources - Maps 55, 59, and 202 - as part donor
I distinguished several elements of the terrain, several houses, a few trees (forest), airports, swamps, a mountain, roads and rivers
First I drew a plan - very simple - this is just a rehearsal
Now I move on to making terrain from the available components
I don't know how masters do it - I copy, paste, rotate, transform, trim ...
Now I add the top, then the swamps
Pasted mountain looks sharp - needs shade - I'll add it
The swamps are from a different area (in terms of color) - I leave only the water (I remove the rest)
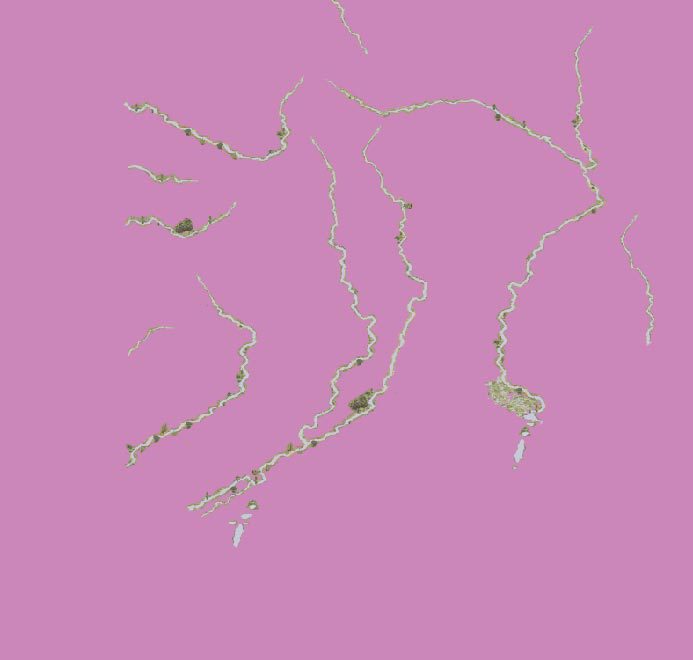
River - pasting from pieces - it's a horror movie
So I draw the river with a suitable brush - I add a recess in the terrain (with a shadow) and it's ready
Now roads - same as with rivers
I paste houses and airports
Lastly, I paste trees / forest
The drawing is ready.
Re: Fun and technology on maps
Hi Sympatyk ,
Looks very promising . Seems to be easy stuff.
How much time did you spend doing this map from puzzles (don't include puzzle preparation)?
Keep doing.
Jaro
Looks very promising . Seems to be easy stuff.
How much time did you spend doing this map from puzzles (don't include puzzle preparation)?
Keep doing.
Jaro
Re: Fun and technology on maps
If you go for it, you will have a large collection of elements soon. I'd also recomment to create a "clean" backround layer and then put some fields and other special undergound into different layers.
I already posted the picture at JP's, but i can post it again, showing my collection of cut out houses, airfields, ports and bridges. I have also large collections of trees and woods and fields, swamps, mountains,...
But nowadays i use the collections not very often anymore. I just load some photoshop files of some of my maps and take the elements directly from the layers.
I will also show the river layer of my new map, which is currently under construction. Once you have some maps with river layers you can easily cut out parts of the rivers and assemble them in a new way. Same with coastline. Coastline and rivers are always different, that why it is not possible to simply copy them.
You can also cut a river into two parts, two shores, and turn them into a big or small river or even a lake (together with other parts).
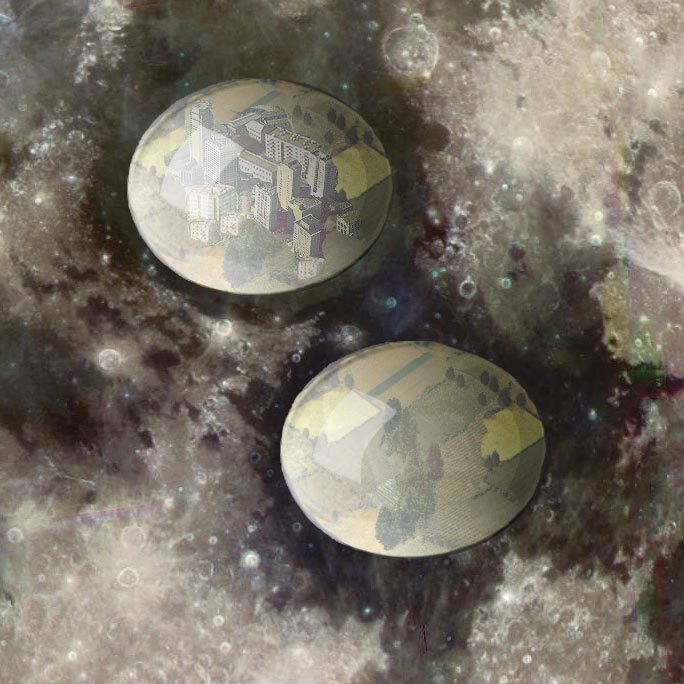
Btw, have you ever tried to build a moon map? I thought it would be funny of we had the same cities and fields on the moon like on our stadard maps. Just under a cupola
Re: Fun and technology on maps
Jarek - too muchHow much time did you spend doing this map from puzzles (don't include puzzle preparation)?
Clemens - Thank you for joining the discussion
Your harvest is impressive
... but the above ones are probably 50% of their natural size - it is difficult to apply to a drawing ... so I would like to ask in an original dimension - maybe they will be useful ...
Can you clarify this?I'd also recomment to create a "clean" backround layer and then put some fields and other special undergound into different layers.
Now a little explanation
Because my vision of copyright was / is a bit different, this is:
- I have a different map making narrative (this is only my personal opinion and should not affect anyone)
- I'm not a fanatic - after all, I enlarged / merged classic maps
- after talking to Gustlik, Luis, Micha -> I know that the situation is not clear-cut -> assuming that it is allowed (everyone takes responsibility)
- this is a closed matter and I do not want to discuss it here
- I should write the clause above -> I use the right to quote - the above drawing will be used to show the tools and methods of creating maps
I think that the graphics programs we use have similar tools
I chose GIMP because it was free software
I use maybe 20-30% of its possibilities
One more thing
Many thanks to Luis for his patience with me
Now we can move on to the merits
If I hadn't treated mapping as having fun, I'd have given it up a long time ago. It was hard work - creating all the components, learning GIMP
Why this topic? - because I want to share my experience and listen to other people
Re: Fun and technology on maps
A pity there is no real discussion because it's always you and me who are talking about maps. Other mapmakers are gone missing or don't want to share their thoughts
For me map making is a lot of fun too but i also HAVE TO do it because i need the maps for my own campaigns and nobody else is going to make the maps i want You know i like the bigger maps and in the past nobody made big maps because it was not possible to use them.
Sorry, but i don't want to give away my readymade element collections because how will a map maker learn it when you get everything readymade?
It took me many months of mapmaking to collect everything and it was also a process of learning how to design the maps. When i was a beginner, every time i made a new map in a new style i collected the elements i used for the first time. Of course you are a experienced map maker and you already know how to do it.
But as i've said, i rarely use the collections nowadays because i directly take the elements i need from the layers of my photoshop files which have the same style than the map i am working on. It's all classic style, but there are many different styles.
Anyway, with a "clean background" i meant the base layer of a map. I prefer a mostly clean background and and then have all the layers for roads, fields, cities, rivers,...
These are 3150 x 3000 pixel:
Re: Fun and technology on maps
Clemens
I wanted to make sure -> when you make a map, you save it on separate layers - terrain, forest, houses, rivers, etc.?
If so -> can you send me separate layers - city and forest (png or jpg) - for the map 1460?
I do that too for some layersBut nowadays i use the collections not very often anymore. I just load some photoshop files of some of my maps and take the elements directly from the layers.
It was so... You reminded me - how I made cities for the first map ..It took me many months of mapmaking to collect everything and it was also a process of learning how to design the maps. When i was a beginner, every time i made a new map in a new style i collected the elements i used for the first time. Of course you are a experienced map maker and you already know how to do it.
No - they are 600x572 -> only these can be downloaded ...These are 3150 x 3000 pixel:
.... My drawing technique has changed
I had a stage of assembling maps from a puzzle
Then a quick drawing of the finished layers
I was interested in tiles
Inspired by this - I gave up making bridges, pampered rivers in favor of - greater compatibility of the drawing with mapx
Now for some history
There was a topic on JPs on how to make maps - currently not available
There is such a topic on the Polish forum (led by Gustlik, started in early 2011)
Although some things are out of date - it can be good for beginners ... although in Polish
http://forum.opengeneral.pl/instalacja- ... ne/1456/0/
Re: Fun and technology on maps
In 2014 I made a video - how to plant a forest in 5 minutes ...
https://drive.google.com/file/d/1a_UH_H ... sp=sharing
Re: Fun and technology on maps
These pictures were just examples. I have so many files, so many maps, photos, elements, clean backgrounds and other stuff. My whole OG resources/map making folder has 13000 files and 19GB
Map 1460 is an exeption. You know, it is a modification of map no. 13 and i will probably never use the "southeast US coast" style again. So i did not use any layers and every element is merged to the base layer once it was in place.
It all depends on the map and sometimes i use many layers and sometimes i don't use layers at all. For example, for the map i am currently working at, i have 18 different layers. This is the map (i posted before):
Re: Fun and technology on maps
These pictures were just examples.
OKMap 1460 is an exeption.
In our example drawing, I changed the ground, trees, cities, swamps - according to my style
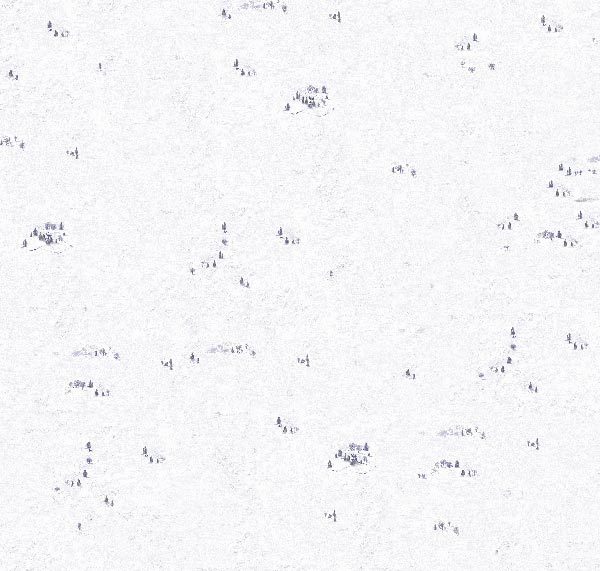
Yes, it looks more naked - but such a drawing (the whole) can be done in 3 hours ... Of course, other elements can be added ..
The bottom layer can easily be a different color
Re: Fun and technology on maps
I would join, but after I've done some five or so maps, I'm totally exhausted. Mapmaking is such a hard work, and I guess I'll never make another one, unless it'll be something silly like frozen ocean or 20x20 dungeon.
Re: Fun and technology on maps
Time for something more ...
Our two drawings converted to winter
And something else - a video on how to do it
Sorry for the poor professionalism - it is in Polish
The recording program also worked poorly with GIMP
You can see my mistakes, but I won't do it again
Explanations
First, in GIMP, I create a Composite / Associative layer from all layers - it's exactly like the file I exported to png
I'm carrying her downstairs
Now I use the colorize tool (white), then adjust the brightness and contrast for this layer
I will do the same for the mountain, the forest ..
For rivers, swamps, cities will reduce the layer coverage
Roads and airports will get a different color
Highlights and shadows as you like
And finally, I removed some of the swamps from the river area .. this is not seen in the video
https://drive.google.com/file/d/1f15gW6 ... sp=sharing
Re: Fun and technology on maps
Hi
I didn't read this topic until today, as it's in the polish forum and my polish is non-existent.
After a long vacation, I'm still trying to remember how I did maps before, but I'll share what I remember.
Well, maybe icon-making it's more time-consuming, at least as I did them.
I didn't read this topic until today, as it's in the polish forum and my polish is non-existent.
After a long vacation, I'm still trying to remember how I did maps before, but I'll share what I remember.
- I started with a base terrain layer that I had done, not as elaborate as randowe's one (nice one! )
- Then added a new layer with a hex pattern, to better adjust the map.
- I drew a simple sketch of the map in a new layer, usually with another layer below with an imported image of a real map of the area.
- I searched for maps with similar terrain palete as I the one that I wanted to do (I had the full set of maps in my HD...)
- Then I went copy/paste with big chunks of original maps and used the eraser in the edges to soften them; each terrain type in its own layer.
- The roads and rivers were in their own layers and usually drawn with a shadow, like the rivers from sympatyk.
Well, maybe icon-making it's more time-consuming, at least as I did them.
One last fight, it's the death throes of the 3rd Reich
Justice shall be done, The final battle remains
Ammo is running low, they're depleting their machine guns
Every bullet counts until surrender is announced
Sabaton - The Last Battle
Justice shall be done, The final battle remains
Ammo is running low, they're depleting their machine guns
Every bullet counts until surrender is announced
Sabaton - The Last Battle
Re: Fun and technology on maps
Yes, it's true. Icon making is more time-consuming because you have to be more accurate and have to spend much more time to make a good-looking icon from all angles.
When making a map a little bit of inaccuray, some ghost pixels or a soft edge with transparent pixels is hardly a problem. Also, as you said, it is possible to use large chunks of existing material or cut out elements from some kind of library.
Btw, @ sympatyk, do you have map making plans for the future? Are there maps you are going to make, or maps you would like to make?
EDIT: edited typo
Last edited by randowe on 2020-12-03 19:51, Thursday, edited 1 time in total.
Re: Fun and technology on maps
It's a very difficult question
Well, frankly speaking, my maps (style) are not very popular in this forum
People prefer classic style
I was constantly searching and discovering new techniques.
Currently, I decided that the best maps are those where the drawing exactly matches the mapx. They should be done quickly and be an alternative to tiles
Almost all maps were for the Polish e-file
Maps made for PEG are a different story
Making a drawing is one thing, planning maps, making mapx (names) is another thing (language)
In this crazy situation - I don't plan anything
Glad you have Clemens - so much power and enthusiasm
Re: Fun and technology on maps
Yes, and to make that easier I came to the crazy idea of creating a 3D model of every icon that I did...
Amen to that.
One last fight, it's the death throes of the 3rd Reich
Justice shall be done, The final battle remains
Ammo is running low, they're depleting their machine guns
Every bullet counts until surrender is announced
Sabaton - The Last Battle
Justice shall be done, The final battle remains
Ammo is running low, they're depleting their machine guns
Every bullet counts until surrender is announced
Sabaton - The Last Battle
Re: Fun and technology on maps
Even though there is no interest, I will present one more movie ..
Technique of drawing with a picture
Tool - cloning -> draw with a brush with a soft tip
Source is a picture (map202)
Choosing - brush size, softness, opacity and other parameters, we can paint our map
It is not necessary to process the edges with an eraser (the joints are not visible)
Since you can in GIMP - then in any other, good drawing program it is possible ...
After all, all these paid programs have to be better than free GIMP
https://drive.google.com/file/d/1L3gtk8 ... sp=sharing
Re: Fun and technology on maps
Good video! And you could rotate between various maps as origin of the clone brush.
Gimp is a good program, maybe I should start using it...
One last fight, it's the death throes of the 3rd Reich
Justice shall be done, The final battle remains
Ammo is running low, they're depleting their machine guns
Every bullet counts until surrender is announced
Sabaton - The Last Battle
Justice shall be done, The final battle remains
Ammo is running low, they're depleting their machine guns
Every bullet counts until surrender is announced
Sabaton - The Last Battle
Re: Fun and technology on maps
Do you remember - the first attempts at making automatic maps?
2013 - the first puzzles / pictures are created
I did my job ...
and used to make a series of maps
This is how the areas of maps 1123, 1124, 1125 were created
Over the years I have used a lot of different techniques
However, the lack of fluency in English bothers me ..
Google translator is useful ... but it cheats sometimes (substitutes words, writes words that you didn't want to write)
What do you think about the summer-winter conversion?
Re: Fun and technology on maps
I remember
When I discover how to post images on the forum, I'll post some of my experiments from that time. If I just could recreate them...
I have the same problem when I try to read the Polish forum or the texts of the campaigns with Gustlik efile
The automatic one that I did to some maps? The result wasn't great...
One last fight, it's the death throes of the 3rd Reich
Justice shall be done, The final battle remains
Ammo is running low, they're depleting their machine guns
Every bullet counts until surrender is announced
Sabaton - The Last Battle
Justice shall be done, The final battle remains
Ammo is running low, they're depleting their machine guns
Every bullet counts until surrender is announced
Sabaton - The Last Battle
Re: Fun and technology on maps
... because it is impossible ... (all elements would have to have perfect contrast and color saturation)
.. but the individual layers - as I described and showed here?
viewtopic.php?f=67&t=437&p=6850#p6633
You can of course discuss - how much color saturation - cities and forests should have on winter maps
It can be argued - should the roads be white, gray, only sunk into the snow layer?
I do not want to persuade anyone - my style - I only share my knowledge
Just like the puzzles shown above - they inspired me to make my maps in 2013 ...
Re: Fun and technology on maps
This is 1460 map converted from summer to winter
Since I did not have a city layer - I put my houses - made for maps for PEG (Vietnam)
I submit this to your criticism
Would such maps meet your expectations?
What is wrong?
https://drive.google.com/file/d/16U0Q_c ... sp=sharing
Re: Fun and technology on maps
It looks like my attempts of doing the same; the only big thing is that houses doesn't seem to fit well; maybe some snow in the roofs, or maybe is a saturation thing.sympatyk wrote: ↑2020-12-16 11:44, Wednesday
This is 1460 map converted from summer to winter
Since I did not have a city layer - I put my houses - made for maps for PEG (Vietnam)
I submit this to your criticism
Would such maps meet your expectations?
What is wrong?
https://drive.google.com/file/d/16U0Q_c ... sp=sharing
The problem is that if you compare them with "handmade" snow maps, they lack something. Maybe some more colour grades, some of the green of the trees showing...
You are making me think about trying again.
One last fight, it's the death throes of the 3rd Reich
Justice shall be done, The final battle remains
Ammo is running low, they're depleting their machine guns
Every bullet counts until surrender is announced
Sabaton - The Last Battle
Justice shall be done, The final battle remains
Ammo is running low, they're depleting their machine guns
Every bullet counts until surrender is announced
Sabaton - The Last Battle
Re: Fun and technology on maps
By the way, this was one of my early experiments with tiles
https://drive.google.com/file/d/1yX4lbj ... sp=sharing
If only I could remember how I did it, I'll make a new tileset. With the new options available, I could improve it a lot...
https://drive.google.com/file/d/1yX4lbj ... sp=sharing
If only I could remember how I did it, I'll make a new tileset. With the new options available, I could improve it a lot...
One last fight, it's the death throes of the 3rd Reich
Justice shall be done, The final battle remains
Ammo is running low, they're depleting their machine guns
Every bullet counts until surrender is announced
Sabaton - The Last Battle
Justice shall be done, The final battle remains
Ammo is running low, they're depleting their machine guns
Every bullet counts until surrender is announced
Sabaton - The Last Battle
Re: Fun and technology on maps
Houses - you can of course manually apply some snow (white) to the roofsGuille wrote: ↑2020-12-16 12:11, Wednesday
It looks like my attempts of doing the same; the only big thing is that houses doesn't seem to fit well; maybe some snow in the roofs, or maybe is a saturation thing.
The problem is that if you compare them with "handmade" snow maps, they lack something. Maybe some more colour grades, some of the green of the trees showing...
You can also make houses for winter - and paste them in instead of the original ones
Forests - if they are separated on a separate layer -> one hand movement -> greener, less green ...
https://drive.google.com/file/d/1U_sY-t ... sp=sharing
We're talking about auto-conversion here ... of course, drawing a map by hand is a different story ...
Tile map options are sewn into the game engine -> do you want to do the 4th generation?Guille wrote: ↑2020-12-16 12:18, Wednesday By the way, this was one of my early experiments with tiles
https://drive.google.com/file/d/1yX4lbj ... sp=sharing
If only I could remember how I did it, I'll make a new tileset. With the new options available, I could improve it a lot...
Of course, everyone can have their own tile / puzzle set
Re: Fun and technology on maps
On a side note, it hardly ever snows in Brunswick, Georgia. Last snow there was 30 years ago as i read. Climate is subtropical there.
Savannah had snow in 2018 though. And in 1996.
EDIT: Brunswick averages 0 inches of snow per year. Thats funny when i compare that with "my" Brunswick. But we hardly have any snow in this area too and its getting less and less. But i don't miss the snow anyway. It's fun for kids, but apart from that, its just a dirty mess
Re: Fun and technology on maps
I like the results. I was thinking something like that, erasing partially the layer masks to show the underlying colour.sympatyk wrote: ↑2020-12-16 13:52, Wednesday Houses - you can of course manually apply some snow (white) to the roofs
You can also make houses for winter - and paste them in instead of the original ones
Forests - if they are separated on a separate layer -> one hand movement -> greener, less green ...
https://drive.google.com/file/d/1U_sY-t ... sp=sharing
We're talking about auto-conversion here ... of course, drawing a map by hand is a different story ...
There is always room for improvement.
randowe wrote: ↑2020-12-16 16:25, Wednesday On a side note, it hardly ever snows in Brunswick, Georgia. Last snow there was 30 years ago as i read. Climate is subtropical there.
Savannah had snow in 2018 though. And in 1996.
EDIT: Brunswick averages 0 inches of snow per year. Thats funny when i compare that with "my" Brunswick. But we hardly have any snow in this area too and its getting less and less. But i don't miss the snow anyway. It's fun for kids, but apart from that, its just a dirty mess
One last fight, it's the death throes of the 3rd Reich
Justice shall be done, The final battle remains
Ammo is running low, they're depleting their machine guns
Every bullet counts until surrender is announced
Sabaton - The Last Battle
Justice shall be done, The final battle remains
Ammo is running low, they're depleting their machine guns
Every bullet counts until surrender is announced
Sabaton - The Last Battle
Re: Fun and technology on maps
Well well
Map 1460 - No snow -> but perfect for exercise - and how will the climate change?
The new world of tiles - for all climates and weather conditions - a big challenge
Good luck
It's not time for me -> pictures that are too small
I made a dozen icons - also -> not those eyes, pixels, pixels ...
Re: Fun and technology on maps
Anyone - would like to make a map in the near future and need help?
Style to choose from
I prefer GIMP - it's free
Or maybe you have other questions related to maps?
Style to choose from
I prefer GIMP - it's free
Or maybe you have other questions related to maps?
Re: Fun and technology on maps
Tips - How to make a map?
Most people are probably familiar with the basics of maps in OG / PG2
Due to the lack of English language skills, I prefer to write in Polish
Google Translator is available… but I cannot guarantee the correct translation
This is not a template - step by step → only help ..
You can always ask….
I do not prefer my technique and the programs I use → but I will show how I can ...
Maybe other users will fill in my knowledge gaps and show their ways?
..........................................................................................
Wskazówki - Jak robić mapę?
Większość osób zna pewnie podstawowe zagadnienia o mapach w OG/PG2
Ze względu na nieumiejętność języka angielskiego wolę pisać po polsku
Translator Google jest do dyspozycji … ale nie gwarantuję poprawnego tłumaczenia
To nie jest szablon – krok po kroku → lecz tylko pomoc..
Zawsze można zapytać ….
Nie preferuję swojej techniki i używanych programów → lecz będę pokazywał jak umiem …
Może inni użytkownicy uzupełnią moje braki wiedzy i pokażą swoje sposoby?
Przygotowanie
Przed postawieniem pierwszej kreski na rysunku należy zadać sobie kilka pytań
Mapa ma być podstawą/planszą bitwy, a nie po prostu np: mapą okolic …
Więc pytania – jaka bitwa/bitwy? Jaki obszar? Czy są plany/mapy z czasów kiedy to się wydarzyło?
Czy mapa ma być bardziej uniwersalna, czy tylko do jednej bitwy?
Następne pytanie – wygląd mapy
Najczęstszą metodą robienia mapy, jest wycinanie z innych map, pasujących nam fragmentów i sklejanie tych mapowych puzzli w jedną całość. Choć można zrobić to inaczej ...
Teraz trzeba się postarać o przygotowanie fragmentów rysunków – które wykorzystamy do naszej pracy … albo stworzyć odpowiednie pędzle, desenie, warstwy …
Ważne informacje
Dla OG mapa składa się z pliku – mapx – oraz z rysunku (dla tradycyjnej mapy – dla mapy kafelkowej – tylko mapx)
Dla PG2 mapa składa się z pliku - *.map, rysunku oraz z pliku TXT
Hex – podstawowy obszar gry …
Tu zapisujemy jednoznacznie rodzaj terenu, wyznaczamy drogi i tory
Rozmiar heksa to około 60x50 px(pikseli) – jest to bardziej skomplikowane - bo w grze heksy tworzą rodzaj plastra …
Rozmiar obrazka do mapy to obecnie max 5400x5500 px
Poprzednio było 3150x3000, a jeszcze wcześniej 1920x1920 (dla PG2)
W Grze spotkamy różne e-file – pliki elektroniczne określające szereg parametrów gry ważnych tylko w obrębie takiego pliku
Re: Fun and technology on maps
Skala mapy do gry
W PG2 było w zasadzie przyjęte około 1,5 km/hex – oczywiście są od tego odstępstwa …
Ja w większości wykonałem mapy → 1,5km/hex do 2,3km/hex , choć i były pojedyncze mapy 1km/hex i poniżej (głównie dla PEG) oraz 2,5km/hex-2,9km/hex ( do współczesnych scenariuszy)
Format plików graficznych - .png, .jpg, ( do bazy) oraz .shp dla PG2
Narzędzia
1) Edytor Open Suite (PG2 Suite )
2) Program graficzny - GIMP, Paint Shop Pro (posiada już zdefiniowaną paletę barw dla PG2) , Photoshop, inne programy graficzne
3) Baza obrazów jako magazyn "klocków-puzzli", z których składać będziemy mapę.
Dla PG2 obrazki powinny być w formacie .bmp
4) Program do edycji – polecam IrfanView
Skala mapy, gęstość optyczna (w dioptriach) a wymiar obszaru w rzeczywistości
Im dokładniejszą chcemy zrobić mapę – tym potrzebujemy większej skali
Mapa papierowa
1:1 – przedstawia rzeczywistość
1:10 000 – 1 centymetr na mapie – to 100 metrów w rzeczywistości
1:300 000 – 1 centymetr na mapie – to 3 kilometry w rzeczywistości
A jak jest z mapą w postaci skanu? - plik w formacie png, jpg?
Obejrzyjmy rysunek
Widzimy, że mapa ma skalę 1:300 000 Po zrobieni zaznaczenia od 0 do 10 kilometrów na podziałce mapy → odczytujemy wartość w pikselach – jest to ok 520px
Cz zawsze tak będzie, ze skala 1:300 000 na mapie papierowej – to 520 px?
Zobaczmy na innym przykładzie Chcę pobrać mapę Krakowa
Do wyboru mam wiele map. Pobiorę dwie zaznaczone mapy
Różnią się tylko gęstością optyczną ..
Najpierw mapa 400 dpi
Otwieramy ją i badamy ile pikseli przypadnie na 10 km → wychodzi około 520px
Teraz mapa 600 dpi
Tą również badamy i wychodzi na 10 km około 790px
I co z tego?
Dostosowując do naszego obrazka mapowego musimy to odpowiednio przeliczyć
Powiedzmy, ze chcemy zrobić mapkę 3150x3000px
Dla 400dpi to będzie 3150/520 = 6,05 a więc 60,5 km w rzeczywistości
Dla 600dpi to będzie 3150/790 = 3,98 a więc 39,8 km w rzeczywistości
Przeliczmy jeszcze ile to będzie km/hex?
Dla 400dpi to będzie 60,5/70 = 0,86 km/hex
Dla 600dpi to będzie 39,8/70 = 0,56 km/hex
Jeśli chcemy zrobić nie tak dokładną mapkę – na przykład → 1,5 km/hex?
1,5*70 = 105km
Dla 400dpi 105*52 = 5460px (taki obszar trzeba wyciąć z oryginalnej mapy i przeskalować do 3150px)
Dla 600dpi 105*79 = 8295px (taki obszar trzeba wyciąć z oryginalnej mapy i przeskalować do 3150px)
Re: Fun and technology on maps
Maps Google
To narzędzie daje nam możliwość pomiaru odległości
Jest pomocne przy wyborze obszaru mapy
Również wnosi informacje o rodzaju terenów
Można oglądać teren w przybliżeniu
Na podstawie tego narzędzia można zrobić mapy współczesne ...
Dlaczego lubię pracować na warstwach?
Po pierwsze – mam siatkę hex
Po drugie – jeśli coś mam przerobić – to tylko odpowiednią warstwę (miasta, rzeki, lasy …)
Po trzecie – można pracować na szablonach i filtrach
Po czwarte – łatwo zamienię rysunek lato na zima
…
Jeśli robiłbym mapę klasyczną - można zobaczyć efekt przed połączeniem w całość – łatwiej dopasować elementy
Przejdźmy do robienia obrazka
Najpierw wybieramy plan/mapę. Przycinamy do odpowiednich rozmiarów. Następnie skalujemy (Tak jak omówione powyżej) Wczytujemy plik do programu graficznego ….
Wybrałem obrazek z planem bitwy przesłany przez Wonderdoctor
https://i.imgur.com/0bvqO7x.png (Jest już przycięty i przeskalowany przez Wonderdoctor)
Otwieram więc GIMP
Ustawiam białe tło (mapa zimowa)
Teraz wczytuję plan bitwy
Teraz siatka hex ( mam specjalny deseń)
(Sprawdzamy czy rzeki(woda) z miastami, drogami i torami nie mają kolizji ..
Jeśli tak → przesuwamy na inne heksy)
Ustawiam mniejsze krycie obrazka (Tak mi łatwiej rysować)
Wyznaczam rzeki (Specjalnie kolorem lila, aby różniły się od tych na planie)
Teraz wyznaczam heksy gdzie będą miasta
Przechodzę do wyznaczania dróg
Wyznaczam heksy pod las
Teraz zrobię śnieg
Na nowej warstwie użyję desenia „ssnieg”
Dodatkowo użyję też wycinków innej śnieżnej mapy, aby nie było to monotonne
Warstwa śniegu – gotowa
Kopiuję warstwę rzeki i zamieniam kolor na niebieski
Tak samo postępuję z drogami – nadaję szary kolor
Użyję filtr nadający podświetlenie i cień dla dróg i rzek
Włączam siatkę heksów i i zaznaczenie dla miast
Teraz buduję miasta z gotowych domków
Ustawiam krycie warstwy dla miast i kopiuję(duplikat) warstwę
Duplikowaną warstwę miast – zmieniam kolory na odcienie szarości
Ustawiam krycie obu warstw(miasta) – do satysfakcji
Teraz nowa warstwa – domki(dachy) pokryte śniegiem
Używam filtra do podświetlenia domków( tak jak dla rzek i dróg)
Włączam zaznaczenie dla lasów, które wykonałem wcześniej
Rysuję las – (wstawiam, kopiuję ze swoich zbiorów)
Wykonuje podświetlenie i cień ( filtr tak jak wcześniej)
Duplikuję warstwę podświetlenia lasu i umieszczam nad lasem
Tak w skrócie wykonałem obrazek do mapy wg planu bitwy
To wszystko wykonane było na warstwach – dla każdego rodzaju terenu – osobna
Oczywiście ten obrazek został już wcześniej zrobiony ..
Jeśli będą pytania – wyjaśnię ….
- LuisGuzman
- General, Special Forces
- Posts: 673
- Joined: 2019-03-10 08:35, Sunday
- Location: Spain
- Contact:
Re: Fun and technology on maps
Thank you very much Grzegorz
Visit my website to get my latest tools.
Re: Fun and technology on maps
Thank you very much
Maybe it will be useful to someone ...
If something is not understood - one may ask ...
I am using GIMP version 2.8.xx - even though there is a newer version 2.10. xx. Moving from 2.8 to 2.10 -> it's like going from win 98 to win 10 -> different interface, different icons, tools moved to another place ...
I made my first maps in GIMP 2.6 - it was more than enough
If necessary, I will also try to help with the latest version ...
Re: Fun and technology on maps
Paleta kolorów
Color palette
Na początku, kiedy była tylko PG2 i obowiązywały pliki .shp …..
… należało obrazek do mapy robić w formacie .bmp w określonej palecie kolorów.
A, przynajmniej przed konwersją na .bmp → .shp paleta do PG2 była obowiązkowa
Przyjrzyjmy się więc tej palecie …
Wybór padł na dobrze znaną mapkę nr 22 zrobioną przez SSI
In the beginning, when there was only a PG2 game and .shp files were in effect… ..
... you had to make a map picture in .bmp format in a specific color palette.
And, at least before converting to .bmp → .shp, the palette to PG2 was mandatory
So let's take a look at this palette ...
The choice fell on the well-known map number 22 made by SSI
Wczytuję do Photoshop (dobrze że jest nakładka polska)
Robię zapisz do Web
Loading to Photoshop (it's good that there is a Polish overlay)
I'm using - save to Web
Ukazuje się okno z ustawieniami
Mogę wybierać opcję sortowania kolorów palety , określić inne wybory ..
Muszę przyznać – Gimp nie ma takich możliwości
The settings window appears
I can choose to sort the colors of the palette, specify other selections ..
I have to admit - Gimp doesn't have such possibilities
Teraz okno GIMP Now the GIMP window
A teraz porównanie palety w obu programach (może polubił bym Photoshop, ale za 15 dni wygaśnie licencja testowa …)
Now compare the palette in both programs (maybe I would like Photoshop, but the test license will expire in 15 days ...)
Jak widać w obu programach paleta jest taka sama
As you can see, the palette is the same in both programs
No cóż, niestety jest to - niepełna paleta – brak reszty kolorów(powinno być 255)
Obrazki były poddane czyszczeniu aby uzyskać mniejszą wagę ..
Well, unfortunately it is - incomplete palette - no other colors (should be 255)
Images have been cleaned to reduce weight.
Obecnie dla OG można robić obrazki w 24 bit kolorze
Jednak z uwagi na ograniczone miejsce do przechowywania plików, należy zbyt duże pliki w MB – redukoać ..
Currently, for OG you can take pictures in 24 bit color
However, due to the limited space for storing files, you should - too large files in MB - reduce ..
Posiadam dla IrfanView – paletę kolorów dla PG2 – po wczytaniu palety modyfikuje obraz
I have a color palette for IrfanView for PG2 - after loading the palette it modifies the image
https://drive.google.com/file/d/0B3haxa ... sp=sharing
Zobacz
Re: Fun and technology on maps
Mapka Klasyczna - Classic map
Co to jest mapka klasyczna?
Według mnie – jest to styl i paleta taka , jak dla PG2( lub podobna)
Wszyscy, którzy kopiowali fragmenty takich mapek, siłą rzeczy tworzyli klasyczne mapki ...
Jak zrobić klasyczną mapkę?
Najprościej – użyć fragmentów map w stylu SSI
Najprościej, ale trzeba najpierw zgromadzić sporo takich fragmentów/wycinków
No właśnie – ja takich wycinków nie mam … trzeba więc użyć po części innej techniki ..
Najpierw pokarzę jak wycinać, aby krawędzie nie były ostre – lecz miękkie
Otwieramy obraz - źródło
Robimy zaznaczenie (lasso) i używamy zmiękczenia krawędzi
Wycięty kawałek wklejamy do nowej warstwy
Teraz wytniemy jeszcze jeden kawałek z innym ustawieniem
Wkleimy jak poprzednio do nowej warstwy
Warstwę 2 można duplikować i wkleić jako warstwę 3
Następnie obróciłem ją o pewien kąt …
Warstwę 2 i 3 dosunąłem do 1
Połączenie na krawędziach jest zadowalające ...
Jako ostatnią operację używam klonowania
Teraz właśnie klonuję warstwę pierwszą do drugiej
Ustawienie opcji narzędzia daje duże możliwości ….
Film o klonowaniu już pokazałem wcześniej
https://drive.google.com/file/d/1L3gtk8 ... sp=sharing
Jeśli jednak chcemy wycinać i wklejać – to musimy to zrobić dla wszystkich rodzai terenu …
Dlatego potrzebna będzie duża biblioteka wycinków .. choćby taka jaką ma Randowe
Ponieważ nie mam takich zabawek – używam swoich zbiorów, a rzeki, drogi, tory rysuję ..
Zainstalowałem jednak nową wersję Gimpa i dostosowałem interfejs … narzędzia są lepsze ..
Re: Fun and technology on maps
Wytnij – wklej Cut - paste
Przy robieniu map to jest powszechna metoda
Aby wyciąć trzeba zaznaczyć ..
Narzędzi jest kilka
Przyjrzyjmy się zaznaczaniu wg koloru
Na naszej testowej mapce zaznaczymy i zrobimy sobie wycinek rzek
A więc klikamy na rzece mając wybrane narzędzie – zaznacz wg koloru
Teraz pomyśleliśmy, że chcemy mieć rzeki razem z brzegami ..
więc powiększamy zaznaczenie np. o 5px
Jak będziemy taką rzekę wklejać → nie chcemy mieć ostrych krawędzi wycinka ..
więc ybierzemy zmiękczanie zaznaczenia np. o 4px
Następny krok kopiujemy nasze zaznaczone rzeki (Ctrl + C)
Teraz (Ctrl + V) i wybieramy do nowej warstwy
Oto efekt
Mamy trochę niepotrzebnych rzeczy, które były również zaznaczone … pozbędziemy się ich używając np. gumki
Powiększymy obrazek, aby lepiej widzieć – brzegi są do poprawki .. narzędzie Rozmycie Gaussa powinno to załatwić
Ale nie chcemy całego rysunku rozmyć → trzeba zaznaczyć więc krawędzie
Użyjemy zaznacz w/g koloru → klikamy(mając zaznaczone to narzędzie poza rzekami - na pustym)
Używamy - powiększ zaznaczenie - o tyle, aby rzeka i 1-2 px brzegu zostały ostre
Teraz wykonamy Rozmycie Gaussa z menu filtry
Czas na sprawdzenie czy robota nie poszła na marne ..
Zaznaczamy kawałek rzeki i kopiujemy do nowej warstwy
Włączamy widoczność naszej testowej mapy
Przesuwamy warstwę rzeki i ustawiamy tak , aby udawała dopływ ..
Teraz jeszcze dokładne dopasowanie …
Powiększamy sobie obrazek i gumką z miękką krawędzią korygujemy brzeg, oraz przywracamy drogę
Jesteśmy zadowoleni?
Re: Fun and technology on maps
Wytnij – wklej x2 Cut - paste x2
Przedstawię inną metodę …
Nasza mapa testowa – Duplikujemy warstwę
Włączamy szybką maskę – szybciej jest nacisnąć na prostokąt na dole, lewa strona
Robimy zaznaczenie wg koloru i powiększamy np. o 3 px
Odwracamy zaznaczenie
Dodajemy maskę warstwy – biała
Sprawdzamy/zaznaczamy modyfikowanie maski
Kubełkiem wypełniamy/malujemy na czarno – zmieni nam się wygląd maski
Następny krok filtr - Rozmycie Gaussa
Zastosujemy maskę warstwy
Po wyłączeniu szybkiej maski i podglądu dolnej warstwy – zobaczymy nasze rzeki na przeźroczystej warstwie
Dla sprawdzenia zaznaczamy i kopiujemy wycinek rzeki (Ctrl + C)
Następnie (Ctrl + V) – wklejamy ten wycinek do nowej warstwy
Włączamy widoczność dolnej warstwy i przenosimy wycinek rzeki (wklejona warstwa) na właściwe miejsce
Robota zakończona … możemy pooglądać w powiększeniu i zastosować kosmetykę – jeśli trzeba ..
Re: Fun and technology on maps
Very good job. Now I only need a translator to understand it, but it seems very interesting. Maybe this will push me to change from my VERY old version of Photoshop to Gimp...
One last fight, it's the death throes of the 3rd Reich
Justice shall be done, The final battle remains
Ammo is running low, they're depleting their machine guns
Every bullet counts until surrender is announced
Sabaton - The Last Battle
Justice shall be done, The final battle remains
Ammo is running low, they're depleting their machine guns
Every bullet counts until surrender is announced
Sabaton - The Last Battle
Re: Fun and technology on maps
Thank you
I think you can read it through an interpreter ... it's just like me - in English
You can always ask to clarify something
Versions in other languages have the tools in the same place ...
Re: Fun and technology on maps
Wytnij – wklej x3 Cut - paste x3
Jeszcze jedna technika zastępująca wytnij wklej .. pisałem o tym wcześniej
Tu przedstawię krok po kroku .. technika klonowania
Potrzebne nam źródło
Jak zawsze użyjemy naszej testowej mapki nr 17
Otwieramy dwie instalacje GIMP (można to robić na warstwach, ale chciałem, aby wszystko było widoczne)
W obie instalacje wczytujemy naszą mapę nr 17
Dolny obraz będzie źródłem
Modyfikować będziemy obraz górny
Tworzymy dwie nowe przeźroczyste warstwy
Warstwę na samej górze nazwiemy – hex – i umieścimy tam siatkę hex
Następnie zmienimy kolor siatki hex na biały, aby było lepiej widzieć ( Zaznaczamy siatkę i wypełniamy kolor biały)
Zmieniamy wielkość obrazka na 100%
Dodajemy dodatkową warstwę na której wyznaczymy nową drogę
Dolny rysunek (źródło) powiększamy na 200% i szukamy odpowiadającego fragmentu drogi
Używamy narzędzia – klonuj - ( Ctrl + i klikamy myszą na wybranym fragmencie – ustawiamy źródło klonowania) → dobieramy odpowiedni pędzel, jego rozmiar i twardość
Przechodzimy na górny rysunek –> przechodzimy na przeźroczystą warstwę na której powstanie - nowa droga. Zaczynamy klonować
Dobieramy odpowiednie źródła na dolnym obrazku według potrzeby
Kiedy skończymy klonowanie – wyłączamy widoczność warstwy pomocniczej z propozycją drogi oraz warstwę hex (obie można usunąć)
Obrazek jest gotowy …
Re: Fun and technology on maps
Since playing with maps - I will show you a tool for tile maps.
This tool has been around for some time - it crashes when pasting names. The bigger the map, the bigger the trouble ..
How to deal with it?
The main thing is to save the result immediately
I'll show you how I do it
First, load the map into the suite (the map that we want to paste into the newly created map)
Because it works only with the * .mapX file -> if it's an earlier map -> create a mapx file (with names) Save (e.g. malaga.mapx)
Now I'm transforming to a tile map. I save (malaga_K.mapx)
I create a new - tile map (the one to which we will paste our maps) I save, for example, Malaga_2.mapx
I'm closing the suite.
I open the suite
Loading Malaga_2.mapx
Using the tile map tool
I paste malaga_K.mapx and IMMEDIATELY save e.g. Malaga_2kaf.mapx
I must close the suite
I open the suite
Loading Malaga_2kaf.mapx
Now I'm loading the picture I made for this map
IMMEDIATELY save eg Malaga_2_a.mapx
I must close the suite
I open the suite
After loading Malaga_2_a.mapx -> I can now freely create the rest of mapx
---------------------------------------------
What if we want to paste more maps?
So let's prepare the next map -> I chose map number 80 (leros.map + Map080.txt) -> it is small and will fit entirely ..
So let's create in suite and write leros.mapx
Now I'm transforming to a tile map. I save (leros_K.mapx) and close the suite
I open the suite
Loading Malaga_2kaf.mapx
Using the tile map tool I paste leros_K.mapx and IMMEDIATELY save e.g. Malaga_leros_kaf.mapx
We are closing the suite
Now we can substitute the image and after transforming it to a normal map (not tiled) according to the procedure described above -> work on
All names and terrains were successfully transferred to a large map when pasted
The most important thing is to save immediately - after each operation on the tile map and to close the suite
Re: Fun and technology on maps
Czy można szybko zrobić mapę?
Oczywiście, że tak!
Jak zaczynałem pracę z obrazkami map – to wszystko było nowe
Uczyłem się Gimpa, uczyłem się co to jest mapa do gry i jakie kryteria musi spełniać.
Moje pierwsze obrazki map nie przypadły do gustu ..
... a ja ciągle szukałem możliwości i nowych rozwiązań.
Był etap map budowanych z puzzli – na modę map kafelkowych …
Był też etap map(obrazków) budowanych w oparciu o szablony …
A więc czy można szybko zrobić mapę? A, całą serię?
W oparciu o szablony zrobiłem od września do listopada 60 map (rysunków)
Były to prace dla PEG. To była wymiana starych rysunków na nowe (zgodnie z plikami *.map)
To były mapki o maksymalnej wielkości do 1920x1920 px
----------------------------------
Can you make a map quickly?
Yes of course!
When I started working with map pictures - it was all new
I was learning Gimp, I was learning what a game map is and what criteria it must meet.
My first pictures of the maps did not like it.
... and I was constantly looking for opportunities and new solutions.
There was a stage of maps built from puzzles - in the fashion of tiled maps ...
There was also a stage of maps (pictures) built on the basis of templates ...
So is it possible to make a map quickly? Oh, a whole series?
Based on the templates, from September to November I made 60 maps (drawings)
These were works for PEG. It was a replacement of old drawings with new ones (according to * .map files)
These were maps with a maximum size of 1920x1920 px
-----------------------------------
Przepraszam, ale nie gwarantuje poprawnego tłumaczenia na angielski
Jest to według Google …
Sorry, but it does not guarantee a correct translation into English
This is according to Google …
--------------------------------------
Pokażę jak to robiłem … I will show how I did it ...
Od Michaela dostawałem obrazek do przeróbki i plik *.map.
Michael gave me a picture to edit and a * .map file.
Np. dostałem ten obrazek. For example, I got this picture.
Na podstawie pliku .map wygenerowałem obrazek.
Based on the .map file, I generated an image.
Teraz zabieramy się do pracy -> te dwa zdjęcia dla Gimpa (oczywiście powiększamy drugie do rozmiaru mapy)
Now we get to work -> these two pictures for Gimp (of course we enlarge the other one to the size of the map)
Najpierw tworzę siatkę heksów. ( na nowej warstwie) First, I create a grid of hexes.(on a new layer)
Następnie tworze nową warstwę -> poszczególnymi kolorami oznaczam odrębne tereny – nadajemy nazwę - roboczy.
Ustawiam krycie warstwy na około 60% → aby widzieć tereny do oznaczenia.
Then I create a new layer -> I mark separate areas with individual colors - we give the name - working layer
I set the layer opacity to around 60% → to see the areas to be tagged
Wstawiam pierwszą warstwę – szablon → trawa. (przezroczystość100.0%)
I put in the first layer - template → grass. (opacity100.0%)
Wstawiam następną warstwę - drugi szablon → ziemia (krycie74,1%)
I put in the next layer - second template → ground (74.1% opacity)
Następna warstwa – trzeci szablon → filtr zielony (krycie55,7%) Tryb – barwa HSV
Next layer - third template → green filter (55.7% opacity) Mode - HSV color
Teraz wyznaczymy teren – pola
duplikat warstwy ziemia – krycie 100% - nazwa pola
przesuwamy warstwę nieznacznie wg pierwotnego położenia
na warstwie robocza – tam gdzie mają być pola (kolor brązowy) → robimy zaznaczenie wg koloru – powiększamy zaznaczenie 3px
odwracamy zaznaczenie
Now we will designate the area - the fields
duplicate of the ground layer - 100% coverage - field name
we move the layer slightly according to the original position
on the working layer - where there are to be fields (Brown color) → we select by color - we enlarge the selection by 3px
we invert the selection
przechodzimy na warstwę pola
naciskamy delete
ponownie powiększamy zaznaczenie o 3px
korzystamy z filtra – rozmycie Gaussa (wartość 7 – 9)
korzystamy z filtra – szum-→ rozrzuć (wartość max 7)
odznaczamy zaznaczenie → warstwa pól jest gotowa …
we go to the field layer
press delete
again we enlarge the selection by 3px
we use the filter - Gaussian blur (value 7 - 9)
we use the filter - noise- → scatter (max value 7)
uncheck the check mark → the field layer is ready …
Aby pola były ładniejsze potrzeba zasadzić rośliny
Tworzymy nową przeźroczystą warstwę – pola zielone
Dobieramy odpowiedni pędzel, ustawiamy jego parametry i rysujemy
Tak to wygląda
To make the fields prettier, you need to plant plants
We create a new transparent layer - green fields
We choose the right brush, set its parameters and draw
This is what it looks like
Aby obraz nabrał trójwymiaru - stosujemy na zasadzoną roślinność filtr - światło i cień → Efekt Xach (kolor podświetlenia e8ebc2, kolor cienia 000000, )
Jeszcze odpowiednie przesunięcie i poziom rozmycia
Ustawiamy po zastosowaniu filtra odpowiednie krycie warstw → 32,9% oraz 42,4%
To make the image take three dimensions - we apply a filter to the planted vegetation - light and shadow → Xach effect (backlight color e8ebc2, shadow color 000000,)
Still the right offset and level of blur
After applying the filter, we set the appropriate layer coverage → 32.9% and 42.4%
Tworzymy następną warstwę → kolor 90bf3e krycie warstwy 19,6%, tryb – połączenie ziarna → jest to czwarty szablon (ja kopiuję tę warstwę)
We create the next layer → color 90bf3e layer opacity 19.6%, mode - grain connection → this is the fourth template (I am copying this layer)
Następna warstwa – nakłada nierówności - szablon piąty → ziemia tekstura (też kopiuję)
Next layer - imposes unevenness - fifth template → soil texture (I also copy)
Następny warstwa - zmieniająca podłoże pod miasta → kolor d9c773, krycie 43,5%
Oczywiście na obrzeżach używam filtru – rozrzucenia i rozmycia Gaussa .. ( wyznaczam z warstwy roboczej – kolor żółty – miasta)
The next layer - changing the surface for cities → color d9c773, 43.5% opacity
Of course, on the periphery I use a filter - Gaussian scatter and blur .. (I determine the yellow color from the working layer – cities)
Skoro mamy przygotowaną całą powierzchnię → można robić zagłębienia → wyznaczam rzekę
Następnie stosuję filtr - światło i cień → Efekt Xach (kolor podświetlenia 25460d, kolor cienia czarny)
Since we have the entire surface prepared → we can make depressions → I designate the river
Then I apply a filter - light and shadow → Xach effect (backlight color 25460d, shadow color black)
Podobnie postępuję z drogami → wyznaczam na nowej warstwie i zastosuje filtr Efekt Xach
I do the same with roads → I designate a new layer and apply the Xach Effect filter
Teraz na nowej warstwie wklejam lotniska (pasy startowe, które mam przygotowane)
Następna warstwa to miasta ( z przygotowanych wcześniej plików) + Efekt Xach
Now, on the new layer, I paste airports (runways that I have prepared)
The next layer is cities (from previously prepared files) + Xach effect
Następne warstwy to las, oraz jungla ( oczywiście Efekt Xach na obie warstwy i jeszcze kolorowanie jungla)
The next layers are the forest and the jungle (of course the Xach effect on both layers and the jungle coloring)
Na koniec lekka korekta całego obrazu → rozjaśnienie i poprawa kontrastuFinally, a slight correction to the whole image → brightening and improving the contrast
To wszystko. Obraz gotowy ..
That's all. Image ready ..
Teraz już dokładnie nie pamiętam( to był rok 2017)wszystkich parametrów, ale dla ciekawych można to odtworzyć i poćwiczyć ..
Now I do not remember exactly (it was 2017) all the parameters, but for those who are curious, it can be recreated and practiced …
Przeglądając katalog z rysunkami map --> można zobaczyć (po datach), że mapki były nieraz robione codziennie po jednej ( po pracy --> wieczorem robiłem całą mapę ..)
When browsing the catalog with map drawings -> you can see (by dates) that the maps were often made one day each day (after work -> in the evening I made the entire map ..)
https://drive.google.com/drive/folders/ ... sp=sharing
Re: Fun and technology on maps
Jak przygotować siatkę hex do OG?
How to prepare a hex mesh for OG?
Za pomocą desenia ...
Zrobiłem film jak zrobić taki deseń i jak z niego korzystać
With pattern ...
I made a video on how to make such a pattern and how to use it
Przepraszam, że jest długi i nieudolny (chciałem duży obraz)
Gdybym mówił po angielsku - byłoby lepiej
Trzeba patrzeć na myszkę i czytać podpowiedzi ..
Sorry it's long and inept (i wanted a big picture)
If I spoke English - it would be better
You have to look at the mouse and read the hints ..
Film jest tu The movie is here
https://drive.google.com/file/d/1-Vn62s ... sp=sharing
Tu można pobrać Hex_OG.png Here you can download Hex_OG.png
https://drive.google.com/file/d/1-KHqml ... sp=sharing
Tu można pobrać Hex_OG.psd Here you can download Hex_OG.psd
https://drive.google.com/file/d/1-T6WYF ... sp=sharing
Tu można pobrać Hex_OG.pat Here you can download Hex_OG.pat
https://drive.google.com/file/d/1-XdRNb ... sp=sharing
Re: Fun and technology on maps
How to convert map image from s16 to jpg?
It's very simple with the Suite - watch the movie
..................................................................
Jak przekonwertować obraz mapy z s16 do jpg?
Z Suite to bardzo proste - obejrzyj film
https://drive.google.com/file/d/12pRLrD ... sp=sharing
It's very simple with the Suite - watch the movie
..................................................................
Jak przekonwertować obraz mapy z s16 do jpg?
Z Suite to bardzo proste - obejrzyj film
https://drive.google.com/file/d/12pRLrD ... sp=sharing
Re: Fun and technology on maps
Hello sympatyk
If you are interested you could help me with a enlarged version of map #92 Monte Cassino. I would use a 3150x3000 pixel version in a future allied campaign. It would just need some land and sea added to all four directions.
Maps #5 or #409 (enlarged to 3150x3000 pixel) would also be an option, if these maps are more interesting to you.
What do you think?
If you are interested you could help me with a enlarged version of map #92 Monte Cassino. I would use a 3150x3000 pixel version in a future allied campaign. It would just need some land and sea added to all four directions.
Maps #5 or #409 (enlarged to 3150x3000 pixel) would also be an option, if these maps are more interesting to you.
What do you think?
Re: Fun and technology on maps
It's a difficult map - I checked how it looks in google - it's probably easier to do from the beginning ...
Until the end of August, I have a lot of work to do and little time ...
Should it be classic?
Re: Fun and technology on maps
Classic, yes. I thought it would be easier to use #92 Monte Cassino. The map is not accurate but the monastery looks good and it has this "classic italian style".
I just wanted to ask. There is noone else left. If you are not interested in the map and have no fun, then you should not feel obliged to do it. I will skip the scenario in the allied campaign, no problemo
Re: Fun and technology on maps
I'd like to make this map for you!
But I can't promise to do it for various reasons
However, I can make an attempt
Please select the area that suits you on Google - it will be easier this way. Write comments - you probably have your thoughts